
Slaide Tutorial: Web App, Desktop App, and Mobile App
A step-by-step tutorial for Slaide. Let the AI build a deck, present it, and export it, then edit it yourself. In the browser, in the desktop app, and on your phone.
This is the hands-on tutorial. It walks you through every step on all three surfaces:
- The web app at
app.getslaide.com. Nothing to install. - The desktop app. A small native window for Windows, macOS, and Linux.
- The mobile app for iPhone and iPad.
All three run the same engine. A deck you start on your phone opens on your desktop and looks identical. If you want the command line instead, read Getting Started and the CLI reference.
Each part follows the same order, because that is the order people work in:
- Make a deck, and let the AI write it.
- Present it.
- Export it.
- Then change it yourself, in the editor.
You can stop after step 3. Many people do.
Before you start
Three words come up on every screen. Learn them once:
| Word | What it means |
|---|---|
| Deck | Your presentation. Plain text with Markdown content. |
| Master | The design. A small YAML file with colors, fonts, and layouts. |
.slaidec | One file that holds the deck, the master, and every image. Good for sharing and archiving. |
The split matters. Content stays in the deck. Design stays in the master. That is why you can change the look of a whole deck without touching a single slide. Read more in the language docs.
One more thing to know up front. Viewing, editing, presenting, and exporting are free everywhere. The only paid part is the cloud AI that designs a deck for you. See the pricing section.
1. The web app
The web app runs in the browser. There is nothing to install and nothing to update. The AI lives here, so this is the shortest way to a finished deck.
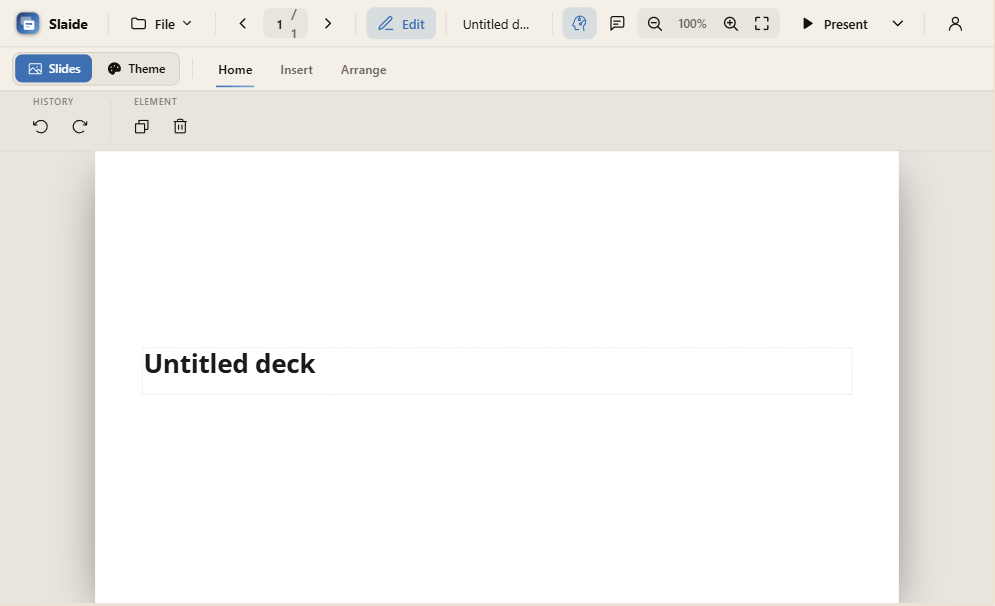
Want to look before you sign up? Open app.getslaide.com/slaide/demo. The demo gives you the real editor on a blank deck, and you can edit and export. You cannot save, import, or use the AI. For those you need an account, and the account is free.
Step 1. Sign in and make a deck
Open app.getslaide.com and sign in. Signing up is free.
You land on your dashboard. It is called Your decks. Every deck you make in the browser lives here.
Click New deck. A dialog opens called Start a new deck. Pick one of three:
| Mode | What it does |
|---|---|
| Start from scratch | A blank deck. The AI designs the theme with you. |
| Use a brand / theme | Reuse a saved brand, or copy the theme from another deck. |
| Import a PPTX | Bring in slides, theme, and images from a .pptx file. |
Give the deck a name and click Create deck. The editor opens.
Tip: click Brands on the dashboard to store your company name and your hex colors. The AI reuses them on every new deck.
Step 2. Let the AI design it
Most people start here. You describe the deck. The AI writes it, themes it, and fills the slides.
Click the AI chat icon. The panel opens on the right.
- Type your brief in the box. It says Ask Slaide to draft or revise this deck…. You can also paste a longer brief, or attach an image.
- Press
Enter. - Watch the phases go by: Planning, Master, Slides, and Review. The slides appear on the canvas as they are written.
- Keep typing to steer it while it runs. Press
Escto stop a running turn. - Click Chats for your history, or + for a new chat.
A good brief names the audience, the length, and the tone. For example: “Series A intro for fintech investors, 12 slides, sober and factual, use our brand colors.”
Your first AI deck is free. Click Generate my free deck when the panel offers it. After that, AI generation needs a Day Pass or a Slaide Hosted plan. Editing and presenting stay free.
Step 3. Present
Click Present. The deck goes full screen and all the app chrome disappears.
If you use Chrome or Edge and you have a second display, click the caret next to Present. You can pick the display for your audience and open Presenter view for yourself. Other browsers present in one window.
The presentation keys are the same everywhere in Slaide:
| Key | What it does |
|---|---|
→ ↓ Space Enter PageDown | Next slide or next build |
← ↑ Backspace PageUp | Previous slide |
Home / End | First slide / last slide |
N | Speaker notes |
F | Full screen |
P | Presenter view |
B / W | Blank the screen to black or white |
F5 | Present from the start |
Shift+F5 | Present from this slide |
? or H | Show the shortcut help |
Esc | Step back out of blank, present, and panels |
Step 4. Export
Open the File menu.
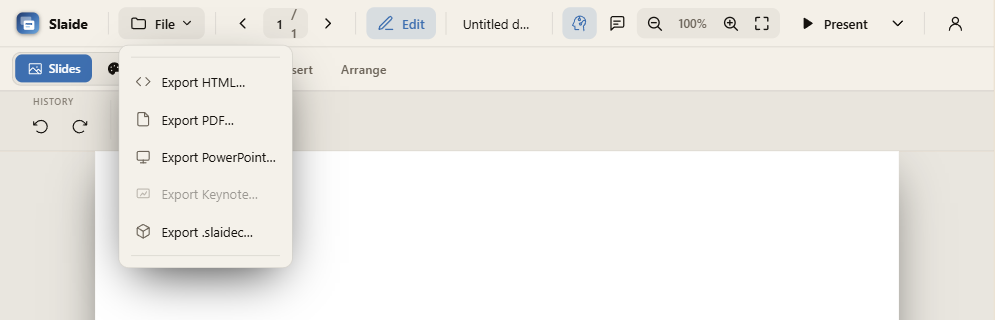
| Menu item | Result |
|---|---|
| Export HTML… | One self-contained index.html |
| Export PDF… | A real multi-page PDF, one page per slide |
| Export PowerPoint… | An editable .pptx with real text and shapes |
| Export Keynote… | A .key file. macOS only. |
| Export .slaidec… | The whole deck as one file |
Each deck card on the dashboard also has a PDF button, so you can export without opening the deck.
That is the whole path: brief, deck, present, export.
Now change it yourself. The AI hands you a finished deck. Everything in it is yours to move. The next three steps are the editor.
Step 5. Find your way around the editor
The screenshot at the top of this section shows the editor. The top bar, from left to right:
| Control | What it does |
|---|---|
| The Slaide mark | Back to your decks |
| File | Open, save, and every export |
‹ 1 / 1 › | Move between slides, or type a slide number |
| Edit | Turn on-slide editing on and off |
| The deck name | Click it to rename the deck |
| AI chat icon | Open and close the AI panel |
| Speaker notes icon | Show the notes for this slide |
| Zoom controls | Zoom out, zoom in, and fit to the window |
| Present | Go full screen. The caret next to it opens the display options. |
| Account icon | Overview, Account, and Log out |
Below the top bar is the ribbon. It only appears while Edit is on.
- The mode switch: Slides edits the deck, Theme edits the master.
- The tabs: Home, Insert, and Arrange.
Step 6. Edit a slide
- Click Edit.
- Click any text on the slide and type.
- Use Insert to add a text box, a box, an ellipse, a line, or an image.
- Use Arrange to center an element or to change its stacking order.
- Use Home for undo, redo, duplicate, and delete.
Click an element and the inspector opens on the right. The tabs you get depend on what you picked: Image, Position, Border, Text, Effects, and Transition.
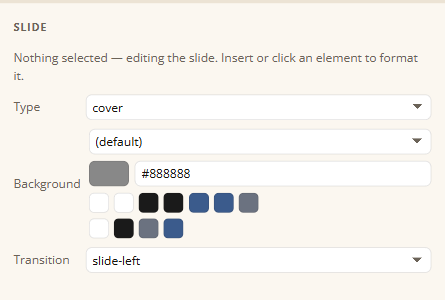
Click nothing, and the inspector edits the slide itself. You get Type (the layout), Background, and Transition.
These keys help:
| Key | What it does |
|---|---|
Ctrl+Z | Undo |
Ctrl+Y or Ctrl+Shift+Z | Redo |
Delete | Delete the selected element |
Esc | Deselect, or cancel an insert |
Your work saves to the cloud on its own after every change. The Save button in the ribbon does something extra: it downloads a .slaidec copy of the deck to your computer. So use it when you want the file, not to protect your work.
Step 7. Restyle the whole deck
Click Theme. This opens the Theme Studio. It edits the master, so it changes every slide at once.
The sections are Colors, Fonts, Type, Background, Layouts, Variants, and Motion.
Change a color here and every slide follows. Your words never move.
2. The desktop app
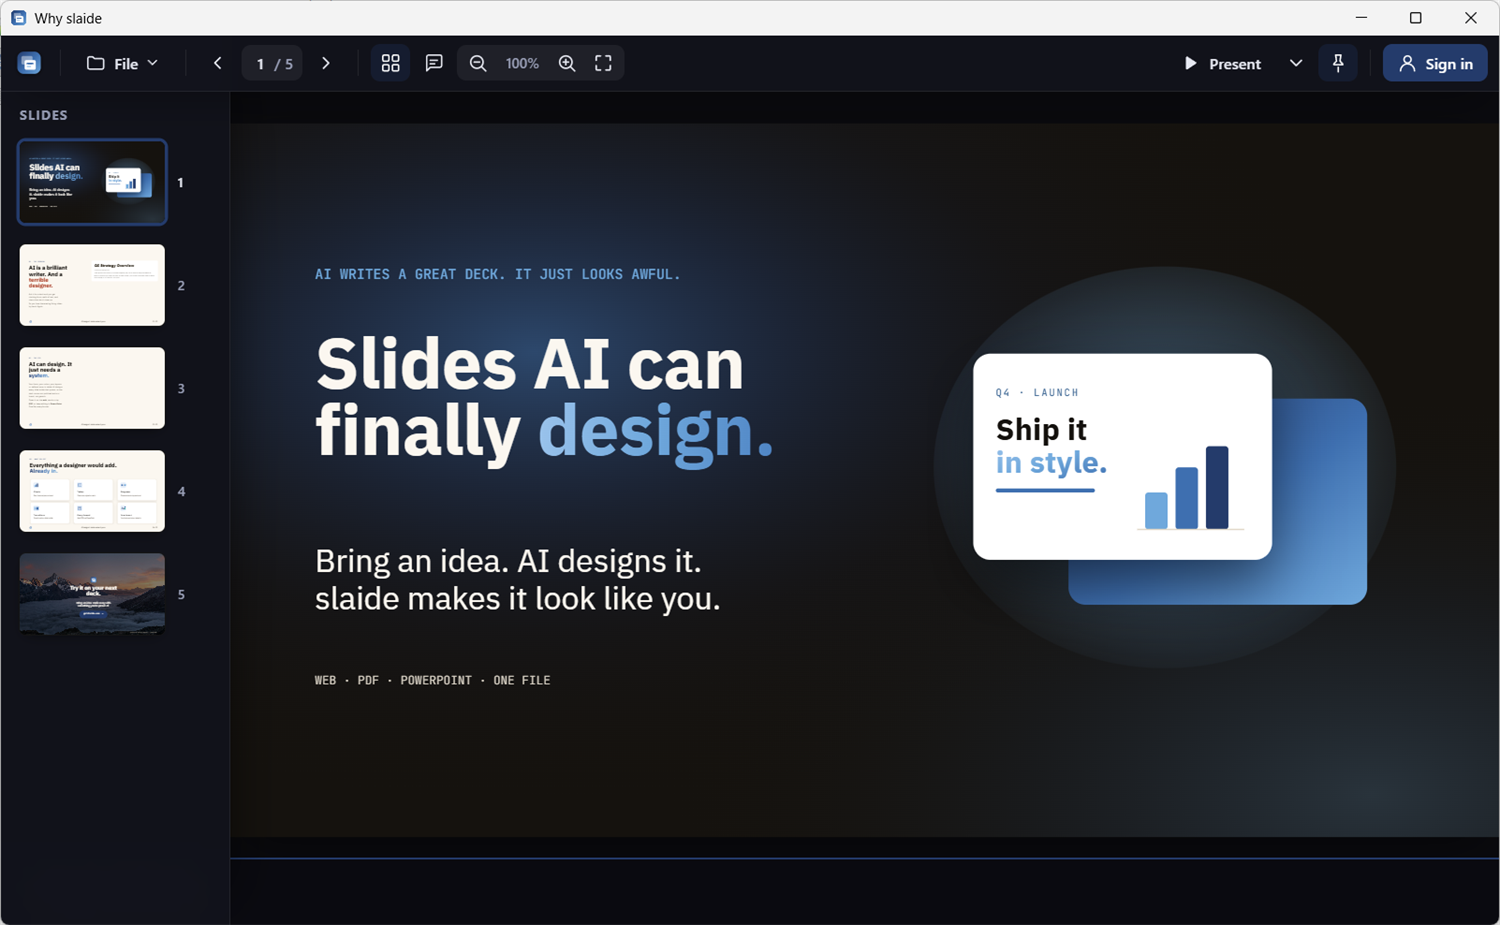
The desktop app is called slaide-view. It is a small native window that renders your deck with the real engine. It needs no Node.js and no network. What you see is exactly what slaide build produces.
Step 1. Install it
- Open the Releases page.
- Download the archive for your system. Windows, macOS, and Linux are built, for x64 and arm64.
- Unpack it.
- Run it.
On Windows the file is slaide-view.exe. On macOS you get Slaide.app and you double-click it. On Linux you need libwebkit2gtk-4.1.
The Windows build is not code-signed yet, so SmartScreen may warn you. Click More info, then Run anyway.
There is a one-line installer too:
curl -fsSL https://getslaide.com/install.sh | sh # macOS and Linux
irm https://getslaide.com/install.ps1 | iex # Windows
Winget, Scoop, and Homebrew also carry it.
Step 2. Associate the file types
Run this once:
slaide-view --register
Now .slaide and .slaidec files open in the app when you double-click them. Use --unregister to undo it. On macOS the .app bundle does this for you.
Step 3. Open a deck
There are three ways in:
- Double-click a
.slaideor.slaidecfile. - Start the app with no file. An open dialog appears.
- Click File, then Open….
The rail on the left is the slide list. Click a thumbnail to jump to that slide. The Slide navigator button hides and shows the rail.
Step 4. Move around
| Control | What it does |
|---|---|
‹ and › | Previous and next slide |
| The number box | Type a slide number and press Enter |
| Zoom in / Zoom out | Change the zoom level |
| Fit to window | Reset the zoom |
The keyboard shortcuts are the same as the ones listed above.
Step 5. Present
Click Present. The deck goes full screen.
With more than one display, click the caret next to the button. It says Present on a specific display. Pick the display for your audience. The app opens a second full-screen window there and switches your own window to presenter view. Presenter view shows Current, Next, and Notes, plus a timer and the clock.
Press Esc to stop.
Step 6. Export
Open the File menu. Every export is free and needs no account:
| Menu item | Result |
|---|---|
| Export HTML… | One self-contained index.html |
| Export PDF… | A real multi-page PDF, one page per slide |
| Export PowerPoint… | An editable .pptx |
| Export Keynote… | A .key file. macOS only. |
| Export .slaidec… | The whole deck as one file |
The PDF export is silent. There is no print dialog.
Now change it yourself. Everything up to here is a viewer. The last step turns the app into an editor.
Step 7. Edit on the slide
Editing needs a free Slaide account. There is no AI here. The AI lives in the web app.
- Click Sign in in the top right. Your browser opens and you sign in there.
- The app downloads the editor engine once. The title bar shows the progress.
- Click Edit.
- Pick a mode. Slides edits the deck. Theme edits the master.
- Use the ribbon tabs: Home, Insert, and Arrange.
- Click a text region on the slide and type.
- Click Save.
Save writes back to the plain-text .slaide file on your disk. Your deck stays diffable, stays in git, and stays yours.
The ribbon holds these groups:
- History: Undo (
Ctrl+Z) and Redo (Ctrl+Y) - Element: Duplicate and Delete (
Del) - Text: Text box
- Shapes: Box, Ellipse, Line
- Media: Insert image
- Align: Center horizontally, Center vertically
- Order: Bring to front, Send to back
What the desktop app does not do
The desktop app is local and offline. It has no cloud sync and no AI chat. Those live in the web app. Use the desktop app when you want speed, no network, and a file on your own disk.
3. The mobile app
The mobile app puts the same engine on a phone and a tablet. It renders on the device. You can view, edit, present, and export with no account and no network.
Slaide for iPhone and iPad is on the App Store. The Android build works but it is not in the Play Store yet.
Step 1. First run
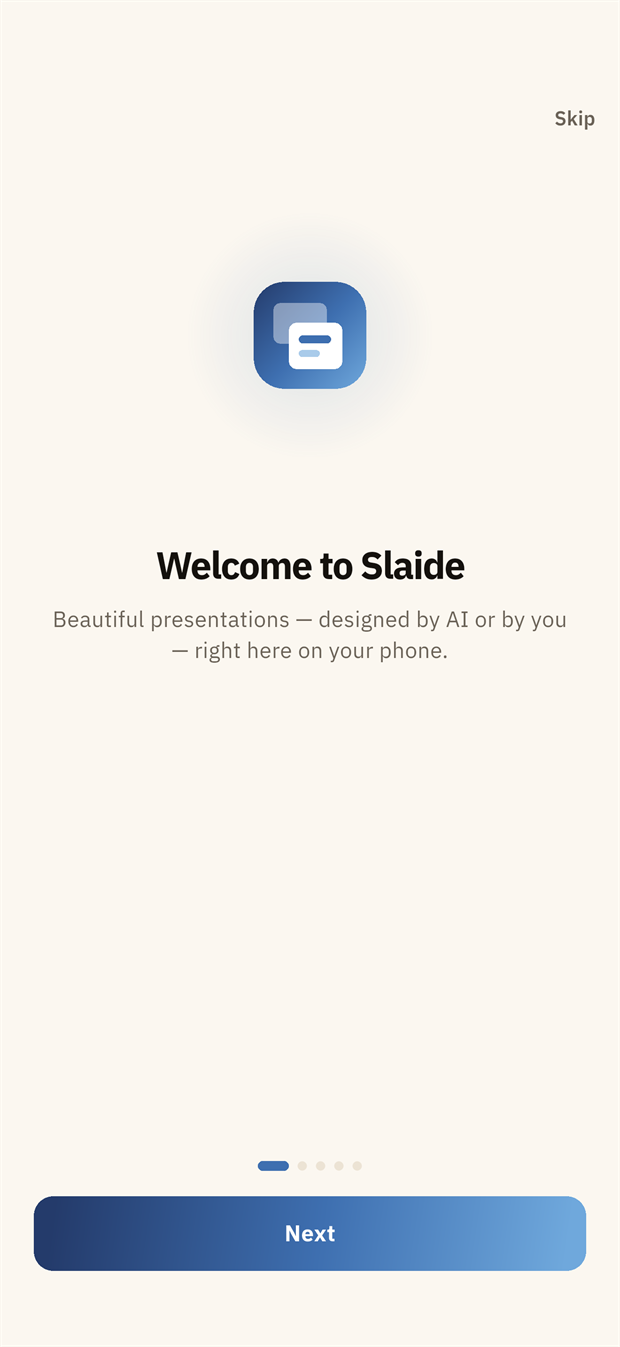
The app opens with five short screens:
- Welcome to Slaide
- Create decks, free
- Present anywhere
- Meet your AI designer
- Enjoying Slaide?
Tap Next to move on. Tap Skip in the top right to jump the whole thing. The button on the last screen says Get started.
Step 2. The library and a new deck
The library is your home screen. It lists every deck on the device under Your decks.
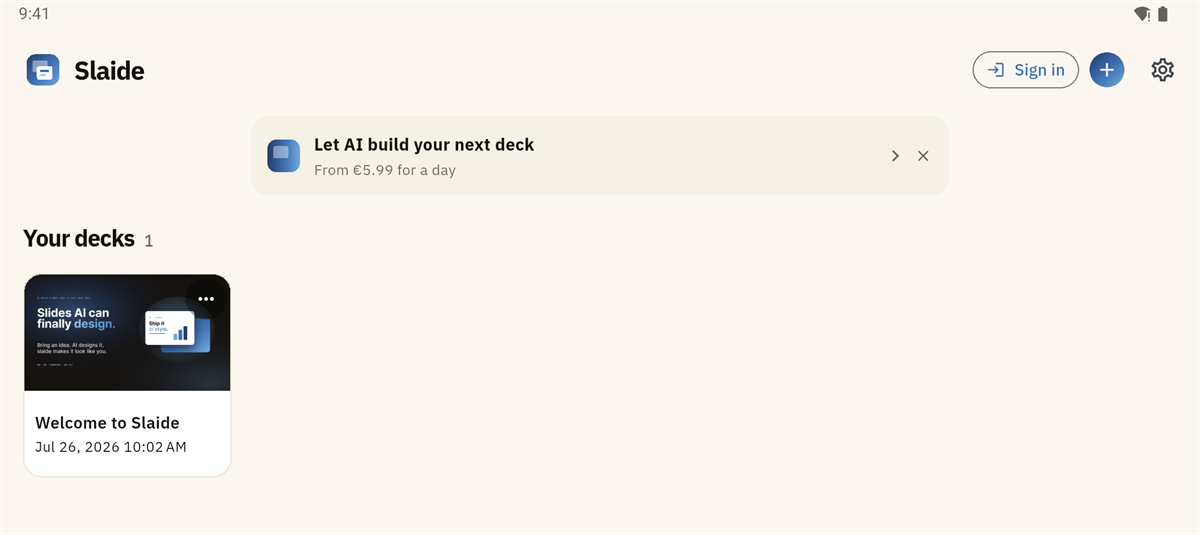
Tap + to open the New deck menu:
| Option | What it does |
|---|---|
| Start with AI | Describe a deck and let the AI build it |
| Blank deck | An empty deck you fill in yourself |
| Example deck | A finished deck to look at and take apart |
| Import file (.slaidec / .pptx) | Bring in a deck you already have |
Tap the … menu on a deck card for Rename, Export / Share…, and Delete.
PowerPoint import runs in the Slaide cloud, so it asks you to sign in first. The account is free.
Step 3. Let the AI design it
Tap Start with AI. This is the normal way to start a deck on a phone.
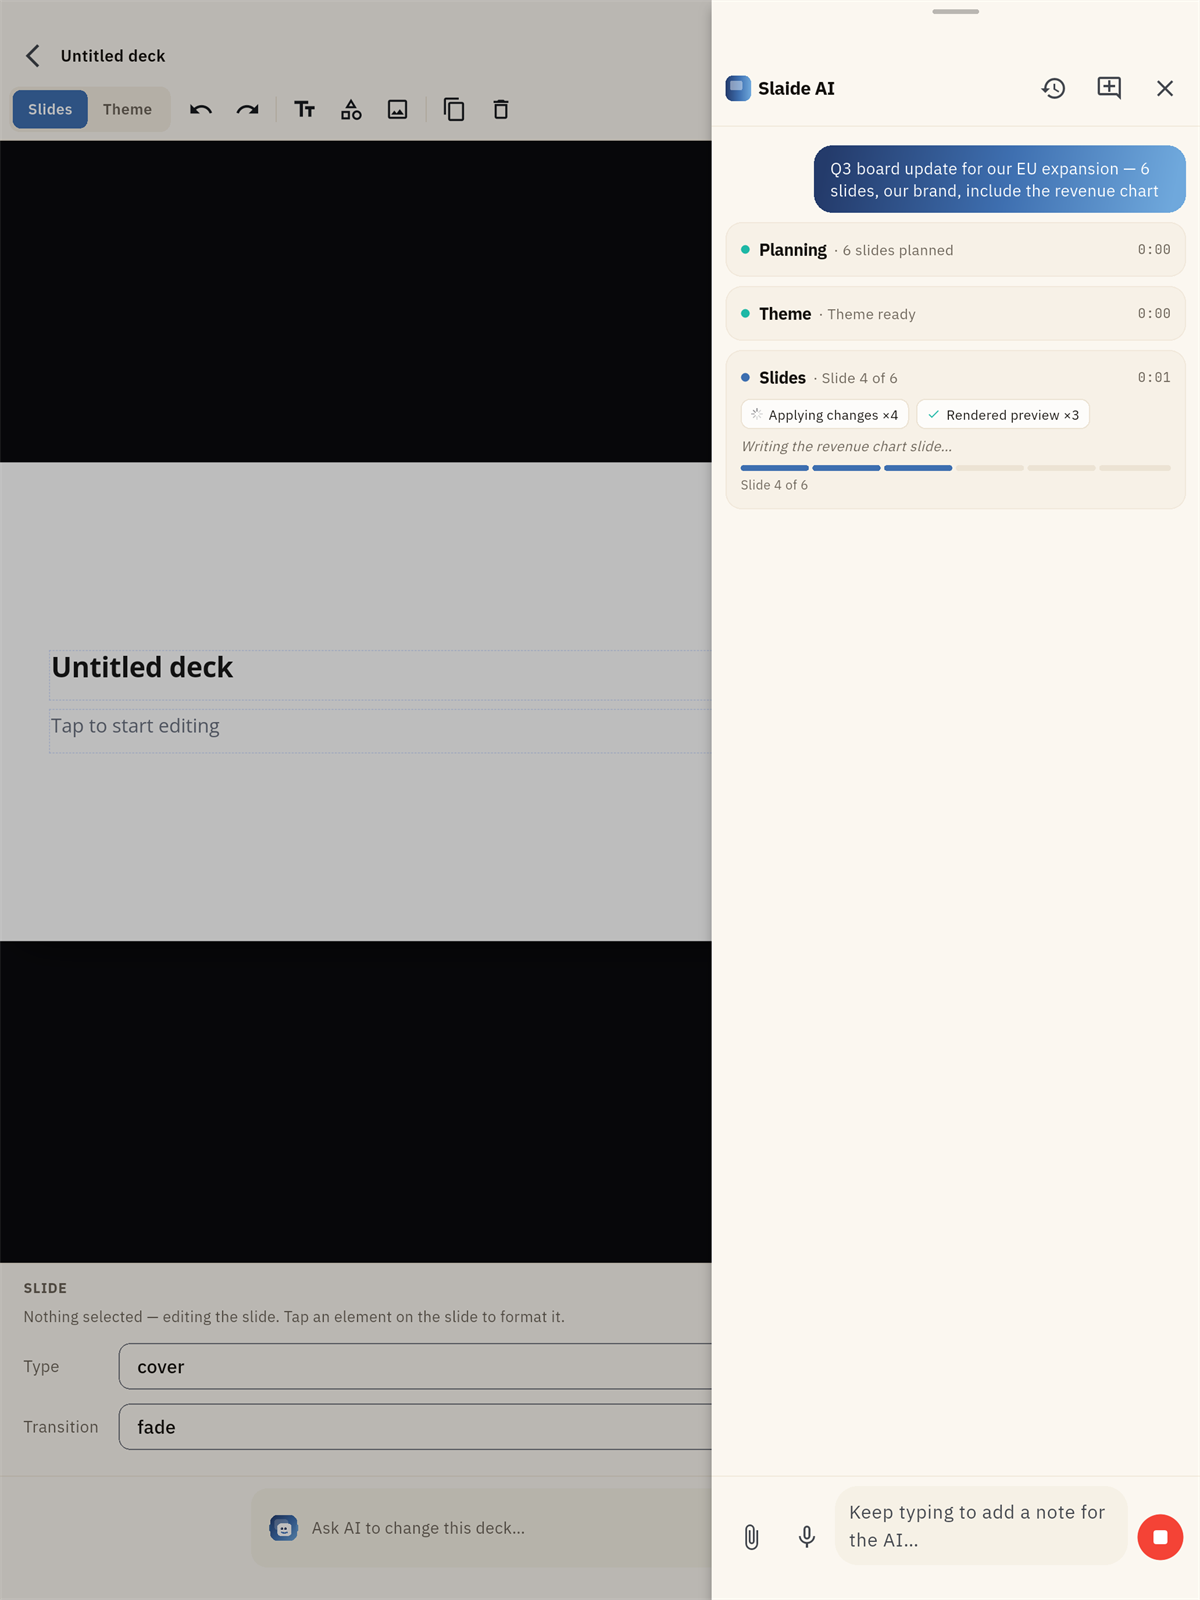
- Tap Start with AI. Or open a deck and tap the AI bar at the bottom. It says Ask AI to change this deck….
- The first time, a dialog appears called Before you use the AI assistant. It tells you what leaves the device. Tap Continue.
- Type your brief. For example: “Q3 board update for our EU expansion, 6 slides, our brand, include the revenue chart.”
- Watch it work. The panel shows Planning, then Theme, then Slides, with the slide count as it goes.
- Keep typing to add notes while it runs.
AI generation is the one paid feature on mobile. Everything else is free. You get one free AI deck when you sign in. After that you need a Day Pass or a Slaide Hosted plan. See the pricing section.
Open Settings to manage this. The Plan chip shows your tier. Manage subscription takes you to the App Store or the Play Store. Restore purchases brings back a plan you already paid for.
Step 4. View and present
Tap a deck to open it. The viewer is free and never asks for anything.
| Gesture | What it does |
|---|---|
| Tap the right side of the screen | Next slide |
| Tap the left quarter | Previous slide |
| Swipe left or right | Next or previous slide |
| Swipe right from the left edge | Back to the library |
| Pinch | Zoom in, then drag to pan |
| Tap Present | Full screen, no app chrome |
| Swipe down while presenting | Leave present mode |
Step 5. Export or share
Tap the … menu on a deck and choose Export / Share…. The sheet is called Export or share this deck:
| Format | Notes |
|---|---|
| Slaide file (.slaidec) | Local. Always free. No account. |
| PowerPoint (.pptx) | Opens in PowerPoint and Keynote |
| For printing and read-only sharing |
PowerPoint and PDF are converted in the Slaide cloud. They are free, but they need a free account.
Now change it yourself. The AI writes the deck. You move whatever you want after that.
Step 6. Edit a slide
Tap Edit. Editing is free on every plan and it runs on the device.
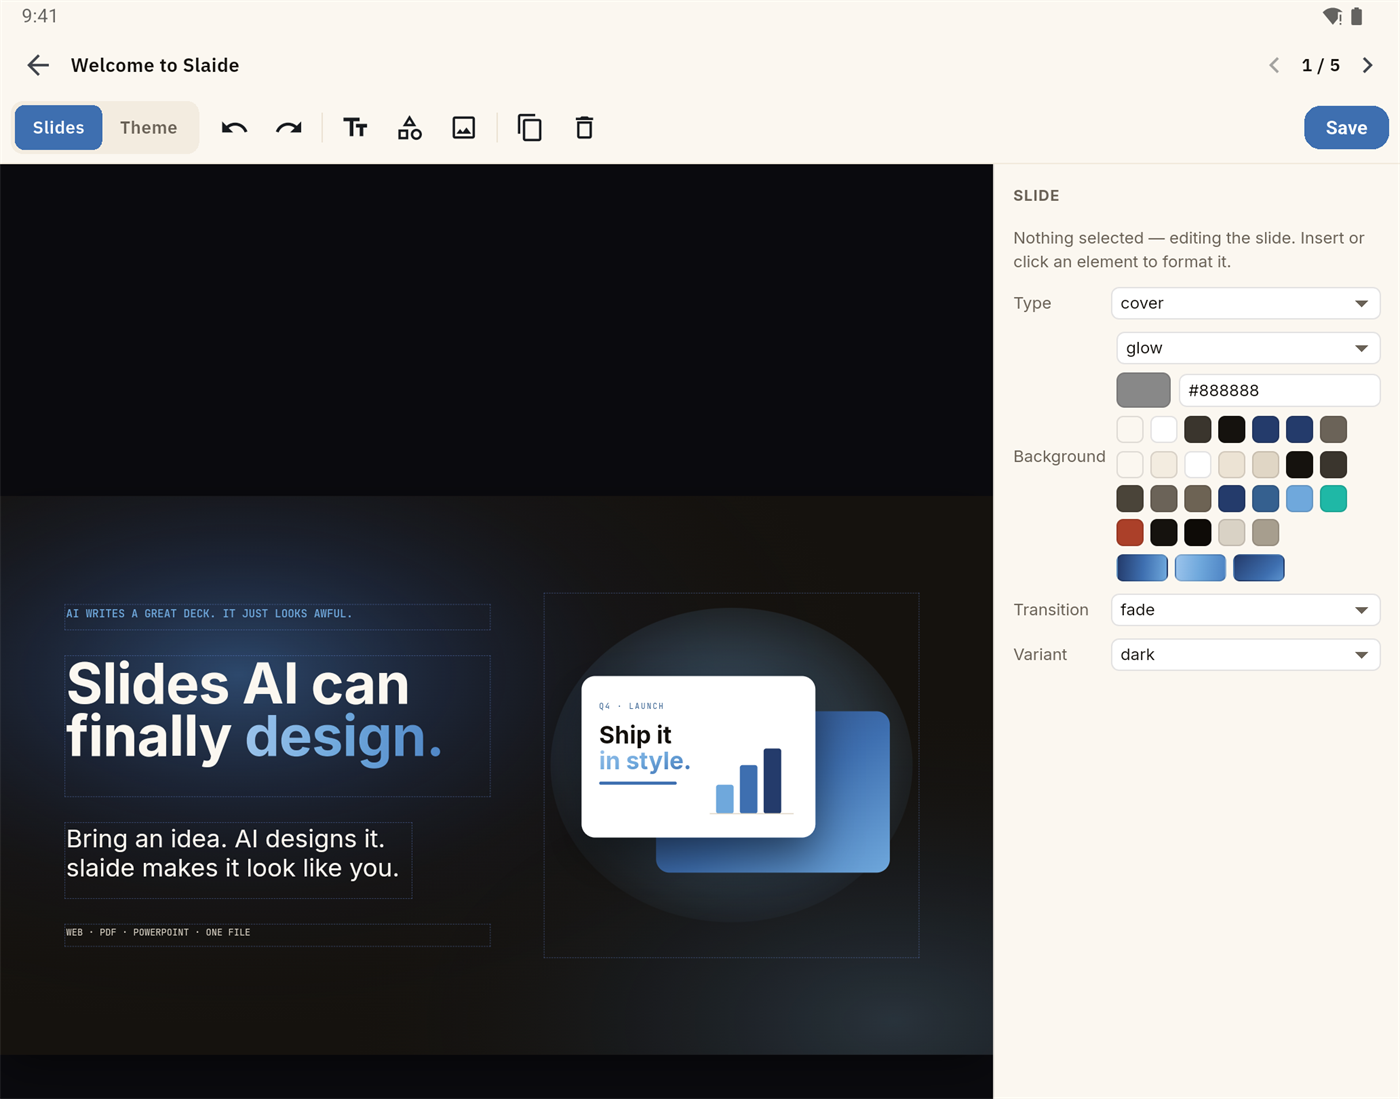
The toolbar is the same one the desktop app uses:
- Switch between Slides and Theme.
- Undo and redo.
- Insert text, a shape, or an image. The shape sheet is called Insert shape and offers Rectangle, Ellipse, and Line.
- Duplicate or delete the selected element.
- Tap Save.
Tap an element on the slide to format it. The inspector opens as a bottom sheet on a phone and as a side panel on a tablet. With nothing selected, the inspector edits the slide itself. You get Type, Background, Transition, and Variant.
Which one should you use?
| You want to | Use |
|---|---|
| Try it in 10 seconds | The web demo |
| Let the AI design a deck | The web app, or the mobile app |
| Present from your own laptop, offline | The desktop app |
| Keep the deck in git | The desktop app, or the CLI |
| Fix a typo on the train | The mobile app |
| Hand one file to someone | Export a .slaidec from any of them |
Get this tutorial as a deck
This whole tutorial is also a Slaide deck. It is a good example of what the format does.
- Download the PDF
- Download the
.slaidec, then open it in the desktop app or withslaide view slaide-tutorial.slaidec
Auf Deutsch
Es gibt eine kurze deutsche Fassung. Sie behandelt nur die Web-App auf app.getslaide.com, in acht Schritten auf zwölf Folien.